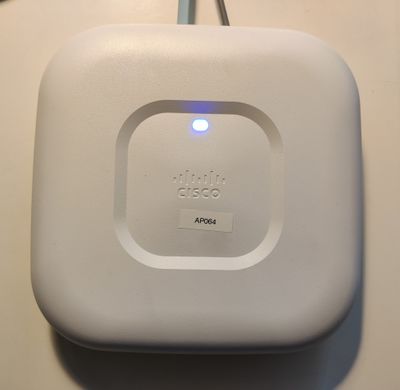
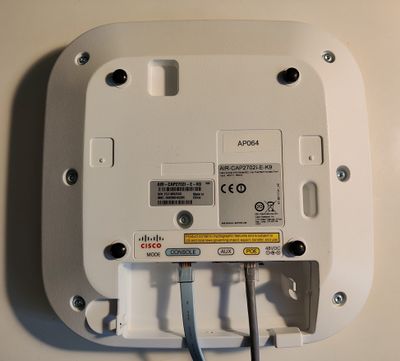
Cisco Air-CAP-2702O-E-K9
Contents
Specifications[edit]
Vendor: Cisco
Model: Aironet 2700 Series 802.11ac Dual Band Access Point
Part Number: AIR-CAP2702I-E-K9 v03
System Memory:
- 512 MB DRAM
- 64 MB flash
Power Draw: 15W
Interfaces:
- 2x10/100/1000BASE-T autosensing (RJ-45)
- Management console port (RJ-45)
CPU: PowerPC CPU at 800Mhz, revision number 0x2151 with 376814K/134656K bytes of memory
Console: 9600 8N1, Hardware Flow Control = no, Software Flow Control = no
Network specs:
- Radio0: 802.11n 2.4GHz
- Radio1: 802.11ac 5GHz
- Max speeds on 5GHz: ~150 Mbps
- Data Transfer Rate: 450 Mbps
- Line Coding Format: CCK
- Data Link Protocol: IEEE 802.11b, IEEE 802.11a, IEEE 802.11g, IEEE 802.11n, IEEE 802.11ac
- Features: Auto-sensing per device, power over Ethernet (PoE), DFS support, Wi-Fi Multimedia (WMM) support, CleanAir technology, Maximum Ratio Combining (MRC), ClientLink 2.0 technology, 3T4R MIMO technology
- Encryption Algorithm: AES, TLS, PEAP, TTLS, TKIP, WPA, WPA2
- Authentication Method: MS-CHAP v.2, Extensible Authentication Protocol (EAP), EAP-FAST
- Compliant Standards: IEEE 802.11b, IEEE 802.11a, IEEE 802.3af, IEEE 802.11d, IEEE 802.11g, IEEE 802.1x, IEEE 802.11i, Wi-Fi CERTIFIED, IEEE 802.11h, IEEE 802.11n, IEEE 802.11ac
- Antenna: Omnidirectional, Internal, Gain 4dB
Entering ROMMON Mode[edit]
ROMmon (ROM Monitor) is a bootstrap program that initializes the hardware and boots the Cisco IOS XE software when you power on or reload a router or other device. If your device does not find a valid system image to load when it is booting, the system enters the ROMMON mode.
- Keep the MODE button pressed while providing the device with power until the LED blinks RED.
Reset Factory Default[edit]
- Enter ROMMON mode
ap: delete flash:/private-multiple-fs
Are you sure you want to delete "flash:/private-multiple-fs" (y/n)?y
File "flash:/private-multiple-fs" deleted
ap: reset
Are you sure you want to reset the system (y/n)?y
System resetting...
Switch to Standalone Mode[edit]
The Aironets support two modes of operations: Autonomous and Lightweight.
The Lightweight mode is for operating with a central controller, thus not requiring extra components (like a webserver for configuring the device through a webinterface).
The Autonomous mode is a full-blown image with all the necessary stuff to manage the device by itself.
We first need to delete all previously install images as they will make it difficult to boot from the correct firmware image.
Delete all previous images[edit]
Boot normally on the device (if you do not have access, perform the Factory Reset, the default credentials will be Cisco:Cisco).
Once logged in, look for traces of the current firmware, will typically look something like ap3g2-rcvk9w8-mx or ap3g2-k9w8-mx.153-3.JA10:
APd46d.50fa.02bc>en
Password: (Cisco)
Directory of flash:/

    2  -rwx         269   Jan 1 1970 00:11:45 +00:00  info
    3  -rwx       54810   Jan 6 2020 05:37:36 +00:00  event.log
   39  drwx         576   Mar 1 1993 00:05:54 +00:00  ap3g2-rcvk9w8-mx
    4  -rwx           0   Mar 1 1993 00:00:34 +00:00  config.txt
    5  -rwx         140   Mar 1 1993 00:00:16 +00:00  env_vars
   37  -rwx          64   Jan 6 2020 05:37:28 +00:00  sensord_CSPRNG0
   15  drwx        2176  Oct 18 2016 12:18:57 +00:00  ap3g2-k9w8-mx.153-3.JA10
   71  drwx         320   Mar 1 1993 00:00:15 +00:00  configs
   78  -rwx       59679   May 3 2019 07:57:51 +00:00  event.capwap
   73  -rwx          64   Jan 6 2020 05:37:28 +00:00  sensord_CSPRNG1
    8  -rwx           0  Oct 20 2016 11:17:59 +00:00  ce
    7  -rwx      129753  Mar 15 2018 15:03:21 +00:00  event.r1
    6  -rwx        1048   Mar 1 1993 00:00:20 +00:00  private-multiple-fs
   11  -rwx      128014   Dec 8 2015 19:59:53 +00:00  event.r0
   84  -rwx          74   Mar 3 2020 17:59:32 +00:00  capwap-saved-config-bak
   87  -rwx       95008  Jun 25 2019 10:26:52 +00:00  lwapp_reap.cfg.bak

APd46d.50fa.02bc# delete /recursive /force flash:/ap3g2-rcvk9w8-mx
APd46d.50fa.02bc# delete /recursive /force flash:/ap3g2-k9w8-mx.153-3.JA10
Switch to Autonomous Mode[edit]
- Prepare a TFTP Server
- The Cisco device will by default use 10.0.0.1 for its IP, therefore, its recommended that you use 10.0.0.10 for your server, but it's not necessary as we can force the device to connect to a specific address.
- The device will expect your firmware tarball to be named something like: "ap3g2-k9w7-tar.default" in your TFTP server root directory. So, if your firmware file is called ap3g2-k9w7-tar.153-3.JPI4.tar, replace everything that comes after the first .tar with .tar.default.
- Go into ROMMON mode
ap: set IP_ADDR 10.0.0.1
ap: set NETMASK 255.255.255.0
ap: tftp_init
ap: ether_init
ap: flash_init
ap: tar -xtract tftp://10.0.0.2/ap3g2-k9w7-tar.default flash:
ap: dir flash:
ap: set boot flash:/ap3g2-k9w7-mx.153-3.JPI4/ap3g2-k9w7-mx.153-3.JPI4
ap: set
ap: boot
Once the Access Point is booted, you could enable the Web Server for managing it that way, however it's pretty crap.
Basic Operations[edit]
Enable the Web Interface[edit]
ap> enable
Password:
ap# configure terminal
Enter configuration commands, one per line.  End with CNTL/Z.
ap(config)#ip http secure-server
% Generating 1024 bit RSA keys, keys will be non-exportable...
[OK] (elapsed time was 0 seconds)

The default password of Cisco routers usually is either “admin”, “cisco” or the field is simply left blank.
ap(config)# end
ap# copy run start
Wifi Configuration[edit]
Creating SSID | Authentication | Apply WPAv2[edit]
cisco-ap> en
Password:
cisco-ap# conf t
Enter configuration commands, one per line.  End with CNTL/Z.
cisco-ap(config)# dot11 ssid 0x20                                   # Create SSID
cisco-ap(config-ssid)# guest-mode 		                    # Turn on SSID Broadcast
cisco-ap(config-ssid)# authentication open                          # Allow anyone to connect
cisco-ap(config-ssid)# authentication key-management wpa version 2  # Use WPA2
cisco-ap(config-ssid)# wpa-psk ascii unicorns                       # Set Password
cisco-ap(config-ssid)# exit
Enable Encryption on Radio | Apply SSID on Interface | Enable Radio[edit]
cisco-ap(config)# interface dot11radio #                        # { 0: 2.4GHz, 1: 5GHz }
cisco-ap(config-if)# encryption mode ciphers aes-ccm  		# Enable Cipher AES-CCM Encryption on interface
cisco-ap(config-if)# ssid 0x20                        		# Enable SSID on Interface
cisco-ap(config-if)# channel dfs                      		# Enable DFS (only for 5GHz Radio)
cisco-ap(config-if)# channel least-congested          		# Select channel type (2.4GHz Radio)
cisco-ap(config-if): world-mode dot11d country-code BE both     # Select country code operation
cisco-ap(config-if): no shutdown
Show Wifi Associations[edit]
cisco-ap#show Dot11 associations

802.11 Client Stations on Dot11Radio1:

SSID [0x20] :

MAC Address    IP address      IPV6 address                           Device        Name            Parent         State
0a1b.6558.0e8d 192.168.50.155  2A02:1812:1603:B530:251B:842F:15CA:10EBunknown       -               self           Assoc

